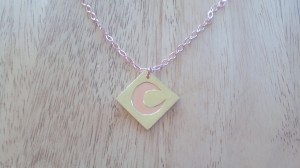
Metalsmithing Notes – from Bead Factory class 7/13/13
choose a pattern. plan for copper on back, brass on front. the copper will oxidize (?) to the brass in the pickling acid bath, and it will be easier to sand off if the brass is on front.
draw each part of the pattern separately on avery peel and stick label.
cut the drawings out, leaving space around them so that you can still see the lines well.
Stick the drawings to the metals.
Saw set up: jewelers bow saw. 2/0 blades. points go outward and toward handle. feed blade into handle side so that on other end, blade is about half way through clamp. Tighten handle side. push other end closer to handle side by pressing against block, until blade is all the way through clamp. Tighten clamp and release. blade should make a note when plucked.
If you have pieces that will have bits cut out of the middle, make a hole where you want a cutout, and feed the blade through before doing the non-handle side clamping. If you want holes for jumprings, etc, punch then now in the front piece. you will use that as a guide to punch a hole in the back piece after soldering them together. MAKE SURE YOU ARE CLOSE ENOUGH TO THE EDGE IF YOU ARE DOING JUMPRINGS!
Cut out the pieces. don’t force the blade, just move it up and down and guide it. to turn a corner, slowly rotate the saw, while still sawing.
put the pieces in a ring clamp with the edge to be smoothed close to the clamp jaw so the pieces don’t bend, and use a file, followed by a padded emery board to even and smooth the edges.
remove the peel and stick. if there is still some sticky, take it off with remover or WD-40.
lay the pieces flat on a rubber holder (theoretically so they don’t move). Use increasingly finer polishing paper (3M Flexible Polishing Papers) to smooth them. keep in a single direction with each type. when you only see scratches going in that direction, rotate the piece a quarter turn, and move to the next finer paper. Front and back of back piece, front sides of front pieces.
Tumble
paint the sides of the parts that will be joined with flux. place small pieces of 70% silver + zinc solder on the front pieces (because if you put them on the back piece, they might not line up with what is cut out). allow the flux to dry a little (wet flux will float the pieces, and they will move on you when you hit them with the torch)
place the pieces together put them on heatproof honeycomb block with a heatproof stone tile underneath. Larger pieces will require a larger, hotter torch. Keeping the flame on the pieces that have solder under them (hold torch about 2-3 inches away), move the flame over the piece slowly. the white flux will go clear at 1100˚. the solder will not flow completely until 1360°. you will see the pieces drop together, and the spaces between will fill in. pick up the finished piece with tweezers, and drop it into water. It will cool immediately.
Move the piece to a warm pickling acid bath to remove the oxidation layer from the copper. once the charring is gone, move the piece to a 50/50 solution of warm pickling acid and hydrogen peroxide until the majority of the copper is off of the brass. (Note: steel should not be put in the pickling. but I don’t remember why.)
File the edges so the pieces match if they are supposed to be the same size. Re-polish if desired to remove any remaining copper on the brass surface.
tumble again.

